Halaman

Senin, 19 Juli 2010

DASHBOARD WIDGETS ON MY MAC OS X DESKTOP?

I've fallen in love with Dashboard on my new Mac OS X Tiger system, but I hate having to type f12 to get them to show up. Is it possible to have my dashboard widgets show up on my regular desktop?


Dave's Answer:

It's not only possible, but it's pretty easy and darn fun! Here's what you need to do...

First, open up Terminal (Applications --> Utilities --> Terminal) and type in the following, exactly as you see here:

defaults write com.apple.dashboard devmode YES

You can just copy and paste from this Web page if you're concerned that you might type in something incorrectly, of course.

You'll get another regular system prompt within Terminal if it works, there's no other output to the defaults program.

Now log out of your account by choosing Apple --> Log Out, and log in again (You need to restart Dashboard).

Ready for the fun now? Press f12 to bring Dashboard up, then drag one of your Dashboard widgets around. While you're still dragging it around (that's critical: keep that mouse button down!) press f12 again.

Poof! Your Dashboard vanishes, but the widget's still visible. Move it to where-ever you want on your screen and it's there, running, fully functional, without the rest of Dashboard around!

You'll notice that it lives above everything else on your screen (at least, I don't know how to push it behind other app windows) so I think you'll have the best results with small widgets that can be tucked into a corner or lined up neatly on an edge.

To move the widget back into the Dashboard world, reverse the trick: begin dragging the widget, then, while still keeping the mouse button down, press f12, then let go of the mouse button. The widget will be restored to its regular Dashboard layer.

dashboard widget on the Mac OS X desktop

In the screenshot above, you can see the dashboard Weather widget floating above Safari and adjacent to the little floating clock from the Date and Time System Preference.

This is a really cool little hack that I like a lot! My thanks to William Ayer for his help on this.

Rabu, 14 Juli 2010

Using SSI with WordPress


Server Side Includes (SSI) are a very powerful tool that can be
used to update multiple pages on a site quickly and with minimum fuss.


e.g. Imagine you had a site and you wanted to include a list of
recommended merchants at the bottom of every page.  What happens if one
of the merchants changes their affiliate link, or drops you as an
affiliate, or simply does not convert?  If you site had 100 pages, you
would have to manually update 100 pages and re-upload all 100 pages. 


With SSI, you would have this list of merchants in a single text
file.  You would then “include” that text file in all of the pages on
your site.


If you need to change a link, you simply change the link in the text
file and re-upload that one file.  The merchant list will then be
updated on every single page of your site.


Typically I’ll have 4 or 5 of these “merchant files” for any site I
build.  The list of merchants and ads shown in these files will be
geared towards the section on my site in which they will appear.  e.g.
on a contact lens site, I would probably have one merchant file for the
pages advertising prescription lenses, and another merchant file for
cosmetic lenses (those lenses that are just for appearance).  I might
even have a separate file for “halloween lenses”, and include photos of
vampire eyes, or cats eyes – whatever is hot at the moment.


By keeping my merchant lists to a few separate files, I can quickly
and easily swap out merchants, add in new promotions (e.g. at Halloween
there are always special offers, and these can be added to all
“Halloween” related pages in a few seconds) and have total control over
what ads are showing on the various sections of my website.  If changes
need to be made, I don’t need to edit every page on my site, just my
include files.


Do you see the power of this?


To help with SSI in WordPress sites, there is a plugin I recommend.  I
have it working on a WordPress 2.7.1. installation so can confirm it is
compatible with this version of WordPress.


WordPress Plugin: Include
It


Download and install it.


Now, in an HTML editor (or text editor if you prefer), create the
file that you want included in your pages.   Construct it in standard
HTML.  It can include a table, headers, affiliate links, text, images
etc.  When you have finished the include file, save it to the root
folder of your site.  You can give it any name you want, e.g.
merchants.txt, merchants.html etc.


Now, with the plugin active, simply add the following code in the
position of your WordPress post that you want the merchant list to
appear:


[include file=merchant.txt]


Save your post, and you are finished.


The contents of the merchant.txt file should display in the post.


Add this line to every post you want the list to appear in.  When you
need to change the merchant list, simply edit the merchant.txt file,
and upload it.  The merchant list will be updated on every page that you
added it to.


Do you have any other uses of SSI that you think readers of this blog
would be interested in?  Please feel free to leave comments on this
article below.  You do not need to register to leave a comment.

Sky Drive Attachment WLW Plugin 1.0

Windows Live SkyDrive is a special service that is
provided by Microsoft
for free. It allows you to store and access your personal files from
anywhere online & it gives you an enormous 25GB space. If you are a
blogger and use Windows Live SkyDrive as your online storage then Sky Drive
Attachment WLW Plugin 1.0 is a must for you. As the name says this
plugin is compatible with all the versions of Windows
Live Writer
and is supported on Microsoft Windows XP and Windows
Vista. This plugin is pretty simple to use. It allows you to access and
manage your Windows Live SkyDrive
account right from Windows Live Writer interface. You can use Windows
Live SkyDrive Attachment
Plugin to upload, and use your file within your blog posts as
attachments. All you have to do is insert your login details and all the
files are shown, now you can select the files which you want to use as
an attachment. For easier access this plugin can
also be used from the sidebar of Windows Live Writer. It is an essential
plugin for Windows
Live
Skydrive user, go and download it now!
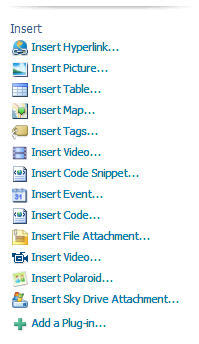
Sky Drive Attachment WLW Plugin 1.0 in sidebar
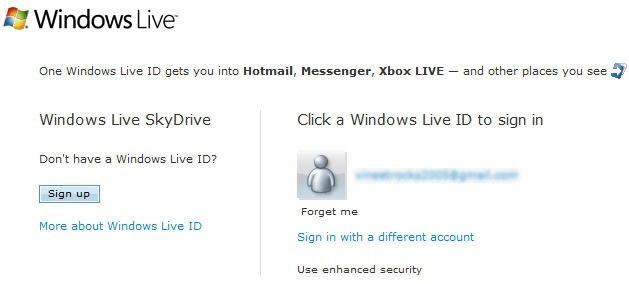
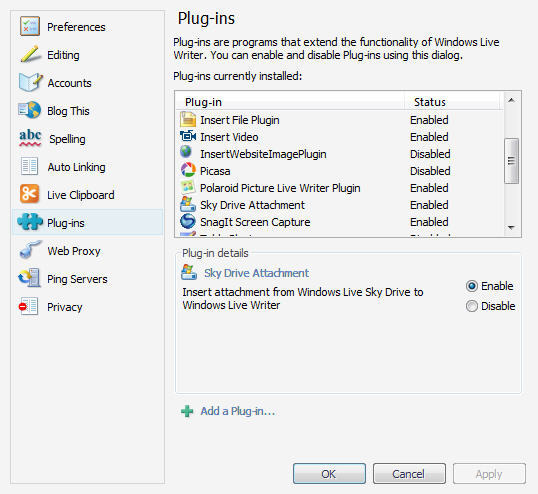
Sky Drive Attachment WLW Plugin 1.0 in WLW Plugin ListSky Drive Attachment WLW Plugin 1.0 Asking for Login Details

Selasa, 13 Juli 2010

Cara Mengubah Tampilan iklan kumpulblogger

Aduuh bingung juga ya ama iklan kumpulblogger,tidak dapat disesuaikan
dengan template blog kita,lihatlah template blogku ini yang serba
gelap,sedangkan script dari iklan kumpul blogger hanya menampilkan putih
saja dan gak ada menu untuk mengubahnya sesuai dengan template
kita,tapi jangan takut deh...mungkin dengan tutorial yang satu ini
kalian bisa tersenyum kembali,cos tampilan iklan kumpul blogger akan
bisa kamu sesuaikan dengan template blog kamu.ni jalan alternatif juga
agar blog kamu tetep terlihat bagus,ha ha ha.....
Caranya
mudah kok,lihat langkah2 dibawah ini:
  • Login Ke blogger
  • Masuk
    ke Dasbor,
  • klik Tata Letak.
  • klik Edit HTML.
  • Pilih
    atau beri tanda cek pada "Expand Template Widget" download dulu
    template kamu untuk keamanan.
  • Cari kode <b:skin><![CDATA[
  • Kalo sudah
    ketemu letakkan kode dibawah ini tepat setelah kode <b:skin><![CDATA[

    .garping,.garpinghor
    {

    border: none
    !important;

    }
    .garping table,.garpinghor table {
    border:#FFFFFF solid 1px !important;
    background-color:#FFFFFF !important;
    }
    .garping td,.garpinghor td{
    color:#000000 !important;
    background-color:#FFFFFF !important;
    font-family:arial !important;
    font-weight: !important;
    font-style: !important;
    }
    .garping a,.garpinghor a{
    color:#000080 !important;
    font-family:arial !important;
    font-weight: !important;
    font-style: !important;
    }
    .garping a:hover,.garpinghor a:hover{
    color:#FF0000 !important;
    }
  • Sehingga akan menjadi seperti dibawah ini:

    <b:skin><![CDATA[.garping,.garpinghor {
    border: none !important;
    }
    .garping table,.garpinghor table {
    border:#FFFFFF solid 1px !important;
    background-color:#FFFFFF
    !important;

    }
    .garping td,.garpinghor td{
    color:#000000 !important;
    background-color:#FFFFFF
    !important;

    font-family:arial
    !important;

    font-weight:
    !important;

    font-style:
    !important;

    }
    .garping a,.garpinghor a{
    color:#000080 !important;
    font-family:arial !important;
    font-weight: !important;
    font-style: !important;
    }
    .garping a:hover,.garpinghor a:hover{
    color:#FF0000 !important;
    }
  • Simpan
    template.
  • Untuk meletakkan iklanya terserah kamu, bisa di
    sidebar seperti saya misalnya,tapi kamu letakkan script seperti berikut
    dibawah ini:

    <div style="overflow:hidden;width:430px;height:250px;padding:10px"> kode iklan kumpul blogger di sini
    </div>

  • Dan
    untuk ukuran kamu bisa ganti yang berwarna merah itu sesuai ukuran yang kamu kehendaki.ok,semoga
    bermanfaat!

Using server-side includes (SSIs) to add content to your web pages

What is an SSI?

A server-side include is code in a web page that tells the
server to add some specified information at that point in the page. It's
a way to extend the content of your page in some useful ways.


Caution: SSIs don't work on every web
server, and the details vary from one to another. This page describes
features which I know work on Apache and Microsoft IIS servers, and are
probably applicable to others.


Ask your web hosting company if (a) you can use SSIs, (b) what file
naming conventions you have to use for them to work, and (c) where you
should keep the files that use them. Then, as long as the answer to (a)
is yes, you can get started.


How do they work?


Unless otherwise instructed, a web server just sends the content of a
web page to the client, your browser. But for an SSI to work, the
server must parse (read) the file, find all the SSIs, and process them
before sending the content to the browser.


The web server can be set up to parse all files (not usual), in which
case, you can name your files with the usual .htm
or .html extensions. However, the usual case is
to have a specific extension set up for parsed files - usually .stm, .php or .asp.
If you use the wrong extension, the SSIs will just be ignored. The
folder that holds them must have appropriate execute or scripting
permissions too, or they will not work.


What can they do?


There are three main uses: to take standard text from another file
and insert it into the page (include files), to insert the value of a
variable quantity into the page, or to run a CGI script other than as
the action of a form.


I'm going to cover the basics here: include files, and some
variables. Many ISPs forbid the running of executables this way because
it can be a security risk, so I'm not going to discuss them here. If you
want detailed information on everything that can be done, a useful
starting point is the link to external site Apache site, or if you have a commercial web
server, the manufacturer's site or the online help should have details
of which directives and variables are available for its product.


Including files


To include some standard text (for example, a disclaimer or
copyright), put one of these lines in your parsed web page where you
want it to appear:


<!--#include file="<em>filename.ext</em>" -->
<!--#include virtual="<em>/path/filename.ext</em>" -->

Note that although this looks like an HTML comment, you must put a
space before the closing -->. Use the first
form if the file is in the same directory or you are specifying a
relative pathname (e.g. ../../copy.inc); the
second for an absolute path (e.g. in another virtual directory - /includes/footer.inc), but never a full HTTP URL. The
file should contain either plain text or HTML markup (inbcluding scripts
of couurse), and can have any name you like, though a .inc
extension is conventional.


Example:


If the file copy.inc includes this text:


<p>The complete contents of this site are copyright <br />&copy; Lois Wakeman 1999-2008 except as expressly noted.</p>

then, if you have this code in your web page:


<!--#include file="copy.inc" -->

you will see this in the browser:


The complete contents of this site are
copyright © Lois Wakeman 1999-2008 except as expressly
noted.


Adding variables to the page


The web server has access to certain standard variables and file
information, which you can put in your page. The most useful for the web
page author are probably:


  • <!--#flastmod virtual="/path/filename.ext"
    -->
    , and its file equivalent, which return the last modified
    date for the specified file.
  • <!--#fsize virtual="/path/filename.ext"
    -->
    , and its file equivalent, which return the size of the
    specified file.

    For example, on a downloads page, it might be useful to have this
    code:


    <a href="/help/styles.zip">Download</a> this file,<br />size <span class="highlight"><!--#fsize virtual="/help/styles.zip" --></span><br />(last updated on <span class="highlight"><!--#flastmod virtual="/help/styles.zip" --></span>).

    which appears in the browser like:


    Download
    this file, size Kb
    (last updated on ).


  • <!--#echo var="variable" -->,
    which returns one of a number of variables concerning the web server's
    environment, the current page, how it was fetched, by whom, etc. Some
    variables that may be useful for web pages are DOCUMENT_URI,
    DATE_GMT, DATE_LOCAL,
    and LAST_MODIFIED, for example:
    • This document can be found at http:/
      - variable DOCUMENT_URI
    • It's
      in Uplyme - variable DATE_LOCAL
    • The page was last modified on
      - variable LAST_MODIFIED


Pros and cons


If you have a large site with a lot of common page elements, include
files can make a big difference to how easy it is to maintain the site.
Instead of updating, say, 50 pages with the same menu or navigation bar,
you can just update the include file once.


Because all the processing is done at the server, you do not
introduce any browser compatibility problems using them. For example,
you can insert the last modified date using JavaScript, but that won't
work for everyone.


Because a page containing SSIs must be parsed, there is a small
processing overhead, but this is not generally significant in my
experience - though a very long page might be noticeably slower to load,
I guess. (But you don't have any of those, do you?)


If you have made a mistake on a parsed page (for example, an include
file cannot be found because the path is wrong), users will get a
message different from the familiar 404 error, which may confuse them
(for example, error processing test.asp file).
This is only a problem if you don't test your pages properly before
publishing them!


So, on balance, if you need the facilities offered by them, I'd say
they were worth the trouble of learning and using.
JavaScript "document.write"

One of the most basic JavaScript commands is document.write.
This simply prints the specified text to the page. To print text
literally, enter the text in single quote marks inside parentheses like
so:


	document.write('Hello World!');

The code above will cause the phrase "Hello World!" to appear on the
page.


You can also use document.write to print
variables. Enter the variable name without quotes, like so:


	var mytext = "Hello again";<br />	document.write(mytext);<br />

Note that if quote marks are placed around the variable name, the
variable name itself will be printed (instead of the variable value).
You can also combine variable values and text strings by using the +
sign:


	var colour1 = "purple";<br />	var colour2 = "pink";<br />	document.write('<p>colour1: ' + colour1 + '<br>colour2: ' + colour2 + '</p>');<br />

Notice the way the variable names are used literally as well as for
passing the values. This will print the following:


colour1: purple
colour2: pink


Remember, text inside quotes will be printed literally, text with no
quotes is assumed to be a variable.

colour1: purple
colour2: pink

How to Update Multiple Web Pages Using JavaScript

Using JavaScript, you can create a separate file which contains
content for your web page. To update all the pages simultaneously,
simply update the JavaScript file.

Pros:


  • Easy to implement.
  • Does not rely on any special HTML extension or server configuration.


Cons:


  • Relies on the user having JavaScript enabled.
  • Updates are more tricky than other methods.


Step 1: Create JavaScript File


Create a plain text document and name it with a .js
extension, for example masterscript.js.
Using the JavaScript document.write
method
, enter the content you want to be displayed on every page
like so:


document.write("<div style='color:blue; font-size:12pt;'>");

document.write("© Copyright Myname 2004");

document.write("</div>");


Note: You don't need to include script tags in this file.


Step 2: Add JavaScript Code to Pages


On every page where you want the content to appear, insert the
following code:


<script language="JavaScript" type="text/javascript"
src="masterscript.js">

</script>


To change the content on every page, edit the contents of the masterscript.js file.


How to Update Multiple Web Pages Using Server Side Includes

SSI (Server Side Include) is a simple and robust way to include
common content in multiple pages. In a similar way to the client-side JavaScript method, SSI involves having a separate file which contains the content you wish to appear on multiple pages. To update the content, you only need to edit a single file.

Pros:
  1. Server-side is safer than client-side (it doesn't rely on any
    browser settings).
  2. Updates are very fast and easy.

Cons:

  1. Slight performance overhead at the server end (every SSI page needs
    to be processed by the server before it is served to the user).
  2. You usually need to use a special extension for web pages, e.g. .shtml.
  3. The server must support Server Side Includes (most Apache servers
    do).


Step 1: Create the SSI File


Create a plain text document and name it with a .txt extension, for example navigation.txt. Save
this file in a folder which is accessible from your whole website. You  may want to make a special folder for this type of file, e.g. /includes/.

Into this file, enter the content you want to be displayed on every  page, for example:


<div style='color:blue; font-size:12pt;'>

<a href="page1.shtml">Page 1</a> | <a
href="page2.shtml">Page 2</a> | <a
href="page3.shtml">Page 3</a>

</div>


Step 2: Insert the SSI Code into Your Pages


On each page, at the point where you want to the content to appear,  place the following code:

<!--#include virtual="/includes/navigation.txt"
-->

To update the content, simply edit the main SSI file and all pages  will automatically update.


Notes:

  • In most cases you will need to change the file extension of your web
    pages to.shtml. If this doesn't work, ask
    your provider for help.
  • If you're creating your pages on a home computer, the SSI includes
    will not show up unless you're running a personal web server. You will
    probably need to upload the pages to your website before you see it all
    work properly.


Selasa, 06 Juli 2010

How to Easily Create RSS Feeds For Your Website!

All the most popular sites provide RSS feeds these days,and you can too!It's simple really!
RSS stand for really simple syndication,or it's sometimes referred to as a rich site summary.It's an XLM-based content format for distributing news,headlines,content,etc.All the most popular sites provide RSS feeds these days,and you can too!It's simple really!
1 All you need is a feed reader,and you can download the feeds from virtually any site that offers them.
Step-2 Firefox has one built in to the browser.Google,Yahoo,and Live all have a way for you to collect your favorite feeds,so the choice is entirely up to you!

Step-3 You can also create feeds for your own websites so your audience can subscribe to them.If done right,you can instantly drive more traffic to your site on a regular basis.This is also an excellent way to bring more repeat traffic to your site(s) .
Step-4 First you need to build your feeds.
Feedforall.com has an easy to use feed builder that lets you create,and manage all your feeds in one place.

Step-5 Or you can use a blog instead.
You can create a free blog at Blogger.com,and the RSS feed URL is automatically generated for you.Word Press is another site that offers a free blog equipped with RSS feeds.
Step6 One of the easiest ways to announce your feed on your site is to use FeedBurner.com.They provide a redirect URL (address)for your feed that your audience can subscribe to.
Step7 You will absolutely rave to friends about FeedBurner.com,because they provide several methods for announcing your RSS feeds!


Read more: http://www.bukisa.com/articles/74181_how-to-easily-create-rss-feeds-for-your-website#ixzz0swZq9qgo

How to Promote Your Blog Using Rss

Some blogger may ignore the RSS because they have no time to manage it. I think the blogger need to promote their blog. You can promote your RSS through facebook, facebook page, twitter, tumblr, feed directory, search engine, and ping service.
Some blogger may besmirch RSS because they do not know or they just concentrate to build a great content only. I think they can be wrong because RSS may help us to raise our traffic. We can spread our RSS feed or Atom to any website.
Here are the places that you can put your RSS or atom feed :
1. Facebook
You can put RSS to your facebook. Off course, you are allowed to put your own blog only. Your friend, family and colleagues may see your blog. I think we do not need to shy to promote our blog.
2. Facebook page
Put your RSS to facebook page. Make the facebook page about your blog, website and business first.
3. Twitter
Twitter is the best friend blogger and it can help you to being indexed. Use twitterfeed to send your RSS to twitter automatically.
4. Tumblr
Tumblr can help you to promote your RSS too. Set the RSS in your tumblr account. The RSS send updates to your Tumblr automatically.
5. Submit your RSS to feed directory
Some feed directory provide RSS submission. You can submit RSS to your feed directory. Some website provide free services. You can try free services first.
6. Submit your RSS to ping services
Ping help you to submit your blog or blog rss to various feed directory or blog directory. Easy type your RSS URL to the website. Your URL will be sent to the website in second.
7. Submit your RSS to search engine
Search engine also help you to being indexed. Submit you URL to yahoo RSS submitter
Using RSS is one way to promote your blog. Therefore, you need to promote your blog through other way. Before submitting to feed, be sure you write the blog description. It help you to get visitor.


Sabtu, 03 Juli 2010

Mengenal Lebih Dalam Spam Jejaring Sosial

Jakarta - Tidak diragukan lagi bahwa jejaring sosial tengah naik daun. Facebook, jejaring sosial yang kini paling populer, melaporkan mempunyai lebih dari 400 juta pengguna aktif. Dengan pertumbuhan kepopulerannya, tak heran jika spammer membajak merek tersebut untuk mengirim pesan sampah (spam). 

Menurut Symantec Messaging and Web Security, salah satu modus yang digunakan spammer adalah membuat pesan dengan cara yang menyerupai email notifikasi resmi dari sebuah situs jejaring sosial. Saat pengguna mengklik untuk membaca 'important notification' ini, mereka bakal diarahkan pada situs berbeda.

"http://odnbo.[DOMAIN REDACTED].net/Wharton.html" adalah contoh dari domain yang dibajak sehingga spammer memperoleh akses ilegal ke server yang sah dan menempatkan file HTML. 

Hal ini membantu spammer menghindari penyaring berbasis reputasi URL. Meskipun file HTML pada domain yang dibajak kadang diberikan dengan maksud untuk mengirimkan konten spam, spam tersebut menggunakan teknik pengalihan untuk mengarahkan pengguna pada situs lainnya (obat-obatan online). 

Meskipun motif spammer ini untuk menjual obat-obatan palsu, Symantec telah menemukan serangan lain dengan tujuan mencuri identitas pengguna. Saat pengguna menjadi korban dari pesan tersebut, akunnya digunakan dengan pintar oleh spammer untuk mengirimkan lebih banyak lagi spam. 

"Hal ini sangat berbahaya karena pengguna lebih rentan untuk mempercayai pesan dari teman-temannya. Dalam satu hal, teknik ini mirip dengan yang digunakan mass mailing worm seperti virus Melissa yang bisa menginfeksi daftar kontak Outlook pengguna hingga mengirimkan email sendiri secara otomatis," tutur Symantec, dalam keterangannya, Kamis (1/7/2010).

Berikut beberapa cara yang digunakan spammer dalam memanfaatkan jejaring sosial untuk mengirim spam:

1. Undangan Palsu
Spammer memalsukan merek jejaring sosial dan mengirim undangan untuk bergabung dalam jejaring tersebut. Meskidemikian, link di dalam email alam mengarahkan ke sebuah website spam. Vektor ini menargetkan semua pengguna, tanpa memperhatikan apakah mereka mempunyai akun atau tidak.

2. Menggabungkan Akun
Notifikasi palsu dikirim kepada pengguna jejaring sosial yang mendorong pengguna untuk menggabungkan akunnya. Dalam prosesnya, pengguna ditanya mengenai data pribadi akun tersebut. Setelah akun tersebut digabungkan, beberapa permintaan menjadi teman (semuanya berisi profil palsu) akan muncul. Semua profil tersebut mempromosikan spam. Akun tersebut juga kini dibajak dan bisa digunakan untuk spam lainnya.

3. Photo tag/Comment
Spammer memembuat pesan sehingga muncul seperti notifikasi photo tag/comment yang sah. Tapi URL di dalam pesan akan mengarahkan ke website lain yang mempromosikan spam.

4. Aplikasi
Karena beberapa jejaring sosial mengijinkan aplikasi pihak ketiga, aplikasi-aplikasi paling populer juga telah menjadi target spammer. Symantec menemukan pesan spam yang mempromosikan cara untuk melawan pemain lain dalam game populer yang ada di situs jejaring sosial.

5. Mengirimkan Malware
Berbagai jenis notifikasi telah dipalsukan untuk menyebar malware.  Salah satu contoh, spammer mengirim pesan yang menganjurkan pengguna untuk mendownload sebuah toolbar jejaring sosial, yang sebenarnya adalah Trojan.

6. Perlindungan Privasi
Karena popularitas jejaring sosial meningkat, telah ada beberapa pengamatan mengenai praktek perlindungan privasi. Symantec menemukan serangan spam yang menawarkan sebuah produk yang memberitahukan pengguna jejaring sosial mana yang menyalahgunakan informasi pribadi mereka.

7. Survei Palsu

Spammer mengirimkan sesuatu yang terlihat seperti survei mengenai jejaring sosial. Pengguna mungkin ditanyakan data pribadi akun atau mereka mungkin dialihkan ke website spam.

Symantec mendorong pengguna untuk mengunjungi website jejaring sosial secara langsung pada sebuah window browser baru, tidak mengklik atau cut dan paste link dalam suatu pesan email. Pengguna juga harus menghindari mengklik link yang tidak dikenal di dalam notifikasi, walaupun diperlihatkan secara langsung dalam website jejaring sosial.